Share cho a e dev PHP.
Để trở thành Senior PHP hãy nắm vững những skill sau:
– cache
– queue
– store file aws s3
– repository service
– nginx rewrite url, proxy pass
– Apache rewrite url
– swagger
– log rotate
– gitops
Bảo đảm lương 2k$.
Tổng công trình sư máy tính | Kiến trúc sư trưởng máy tính | Chuyên gia máy tính
Ở bài viết này ilook sẽ hướng dẫn các Phát triển Blockchain thông qua ngôn ngữ PHP. Hy vọng bài viết sẽ ít nhiều nắm bắt và thực hiện được công nghệ blockchain

Blockchain hiện nay đang là xu hướng mới, đi đến đâu cũng blockchain, và hầu hết 1 số hội thảo công nghệ thì chủ đề blockchain luôn được nhiều các bạn lập trình viên cũng như các nhà quản lý doanh nghiệp đều quan tâm đến, ở bài viết này mình sẽ hướng dẫn các bạn viết 1 blockchain trong php.
Mình sẽ lướt qua khái niệm về blockchain theo cách mình hiểu 1 chút, để bạn nào chưa biết thì có thể hiểu qua về nó và bạn nào biết rồi thì cũng có thể đóng góp ý kiến của các bạn,
Vậy, đầu tiên blockchain là gì ? mà sao đi đâu cũng thấy nhắc đến blockchain? blockchain ra đời khi nào ? Blockchain dùng để làm gì? ứng dụng vào những cái việc gì? nghe thoáng qua ở đâu nói rằng blockchain là bitcoin, hô hố, có phải không nhỉ ?
Bạn tạo 1 thư mục blockchain trong thư mục webservice của bạn nhé, và tạo luôn 1 file index.php để chúng ta viết code trong đó nhé:
Ban đầu chúng ta sẽ khởi tạo 1 class có tên là Block, Class này sẽ làm nhiệm vụ mã hóa toàn bộ dữ liệu vào thành 1 chuỗi khóa, đoạn code sẽ như sau:
Class Block{

public $index; // biến này là index key của 1 block dữ liệu, ở ví dụ này của mình, mình sẽ dùng nó là index, nhưng nếu chúng ta áp dụng thực tế, thì chúng ta có thể coi nó như 1 khóa chính, 1 transaction id, để định danh cho 1 block dữ liệu
public $previousHash; // biến này này hash của block trước block này
public $timeHash; // biến này là thời gian mã hóa của block này
public $data; // biến này là data của block này
public $hash; // biến này chính là hash của block này

    public function __construct($index = 0, $previousHash = '', $timeHash = '', $data = '')
    {

        $this->index = $index;
        $this->previousHash = $previousHash;
        $this->timeHash = $timeHash;
        $this->data = $data;
        $this->hash = $this->execHash();
    }

    public function execHash()
    {

        if(is_array($this->data))
        {
            $data_content = json_encode($this->data);
        }else{
            $data_content = $this->data;
        }

        return hash('sha256', $this->index.$this->previousHash.$this->timeHash.$data_content);
    }

}
Chúng ta chuyển sang tạo Class Blockchain như sau:
Class BlockChain extends Block{

    public $chain = array();

    public function __construct()
    {

    }

}
Class Blockchain này sẽ thực hiện các chức năng như tạo mới 1 block, check xem blockchain này có bị chỉnh sửa hay chưa ?
Như bên trên các bạn cũng thấy, mình khởi tạo 1 class có tên Blockchian và thừa kế lại class Block bên trên, trong class Blockchain này hiện chưa có gì ngoài biến $chain đang được khai báo public và 1 hàm __construct(), việc tiếp theo chúng ta sẽ làm là tạo 1 hàm có chức năng khởi tạo block ban đầu, block ban đầu này cũng khá quan trọng, nó là 1 block ban đầu tạo ra hash, các block sau đó sẽ lấy hashkey của block này để thực hiện việc mã hóa của mình, vậy mình sẽ tạo hàm này trong class Blockchain
public function createGenesisBlock()
{
    return new Block(0,'hash_dau_tien', time(), 'data');
}
Tiếp theo chúng ta sẽ gọi hàm này trong hàm __construct để khi new Blockchain thì hàm createGenesisBlock sẽ được tự động gọi vào
Class BlockChain extends Block{

    public $chain = array();

    public function __construct()
    {
        $this->chain[] = $this->createGenesisBlock();
    }
}
Tiếp theo chúng ta tạo 1 hàm có tên getLatestBlock, hàm này sẽ có nhiệm vụ get ra block cuối cùng trong blockchain, và hàm này có nội dung như sau:
private function getLatestBlock()
    {
        return $this->chain[(count($this->chain) - 1)];
    }
Hàm này thì đơn giản rồi nên mình sẽ không giải thích thêm về hàm này và đi vào viết 1 hàm tiếp theo, hàm này vô cùng quan trọng, hàm này sẽ giúp chúng ta thêm vào block những dữ liệu mới
public function addaBlock($index, $timeHash, $data)
    {
        $previousHash = $this->getLatestBlock()->hash;
        $this->chain[] = new Block($index, $previousHash, $timeHash, $data);
    }
Ở hàm này, mình phải lấy ra được hash của block trước, lấy nó để làm gì ạ? thưa rằng bạn nhìn dòng thứ 2 trong hàm này bạn sẽ thấy Class Block cần truyền vào 1 biến có tên $previousHash, biến này khi thực hiện hash nó sẽ giống như 1 key trong hash, sau này cái $previousHash nó cũng là 1 thành phần để nói rằng block này có hợp lệ không ? block này có bị chỉnh sửa không ?
Okie, có vẻ gần hoàn chỉnh rồi, chúng ra review lại class BlockChain 1 chút nhé
Class BlockChain extends Block{

    public $chain = array();

    public function __construct()
    {
        $this->chain[] = $this->createGenesisBlock();
    }

    public function createGenesisBlock()
    {
        return new Block(0,'hash_dau_tien', time(), 'data');
    }

    private function getLatestBlock()
    {
        return $this->chain[(count($this->chain) - 1)];
    }

    public function addaBlock($index, $timeHash, $data)
    {
        $previousHash = $this->getLatestBlock()->hash;
        $this->chain[] = new Block($index, $previousHash, $timeHash, $data);
    }


}
Tổng cả class Block bên trên chúng ta sẽ có một code cơ bản và hoàn chỉnh
<?php

Class Block{

    public $index;
    public $previousHash;
    public $timeHash;
    public $data;
    public $hash;

    public function __construct($index = 0, $previousHash = '', $timeHash = '', $data = '')
    {

        $this->index = $index;
        $this->previousHash = $previousHash;
        $this->timeHash = $timeHash;
        $this->data = $data;
        $this->hash = $this->execHash();
    }

    public function execHash()
    {

        if(is_array($this->data))
        {
            $data_content = json_encode($this->data);
        }else{
            $data_content = $this->data;
        }

        return hash('sha256', $this->index.$this->previousHash.$this->timeHash.$data_content);
    }

}

Class BlockChain extends Block{

    public $chain = array();

    public function __construct()
    {
        $this->chain[] = $this->createGenesisBlock();
    }

    public function createGenesisBlock()
    {
        return new Block(0,'hash_dau_tien', time(), 'data');
    }

    private function getLatestBlock()
    {
        return $this->chain[(count($this->chain) - 1)];
    }

    public function addaBlock($index, $timeHash, $data)
    {
        $previousHash = $this->getLatestBlock()->hash;
        $this->chain[] = new Block($index, $previousHash, $timeHash, $data);
    }

}
Chúng ta sẽ thêm đoạn này vào cuối file index.php và chạy thử nó nhé
$bl = new BlockChain();
$bl->addaBlock(1,time(), 'Data thứ 2');
$bl->addaBlock(2,time(), 'Data thứ 3');
$bl->addaBlock(3,time(), 'Data thứ 4');
Sau khi chạy, chúng ta sẽ có kết quả như sau:
BlockChain Object
(
    [chain] => Array
        (
            [0] => Block Object
                (
                    [index] => 0
                    [previousHash] => ma_chuoi_dau_tien
                    [timeHash] => 1530436111
                    [data] => data cua toi can tao
                    [hash] => 1067948d9484bb8bf7dcf5a625db12521e8a4f395861dd93b0025aa7714417c6
                )

            [1] => Block Object
                (
                    [index] => 1
                    [previousHash] => 1067948d9484bb8bf7dcf5a625db12521e8a4f395861dd93b0025aa7714417c6
                    [timeHash] => 1530436111
                    [data] => Data thứ 2
                    [hash] => 3f4752159b07a36c2bef5feeda6f4eb25a0472e08d9f3ed629ff9b4293a1a776
                )

            [2] => Block Object
                (
                    [index] => 2
                    [previousHash] => 3f4752159b07a36c2bef5feeda6f4eb25a0472e08d9f3ed629ff9b4293a1a776
                    [timeHash] => 1530436111
                    [data] => Array
                        (
                            [transaction_id] => 12ewe1e12e12eqwd12e1
                            [content] => test
                        )

                    [hash] => be72872e39785b6ccaea102166d278e74ef10b9b7af066edead2a6107e6da27a
                )

            [3] => Block Object
                (
                    [index] => 3
                    [previousHash] => be72872e39785b6ccaea102166d278e74ef10b9b7af066edead2a6107e6da27a
                    [timeHash] => 1530436111
                    [data] => Data thứ 4
                    [hash] => 46af491628171e95276986c996e3f5c155642411bfefc7936fc4688e1d088f98
                )

        )
)
Như vậy là chúng ta đã tạo ra được blockchain với php, thật quá đơn giản phải không các bạn, ở bài sau mình sẽ hướng dẫn các bạn việc kiểm tra xem 1 trong các block trong blockchain đã bị chỉnh sửa hay chưa ?
Thêm phát kết là bitcoin chỉ là 1 loại tiền sử dụng công nghệ blockchain, chứ bitcoin không phải là blockchain, không thể lấy bitcoin làm tên gọi cho blockchain, các bạn đừng nhầm lẫn nhé, ai đang nhầm lẫn thì sửa lại luôn nhé. Hẹn gặp các bạn ở các bài tiếp theo
Các bạn có thể học Microservices qua PHP với series dưới đây. Series rất đầy đủ, bao gồm cả RabbitMQ.
Xin chào các bạn, hôm nay mình muốn chia sẻ về một chủ đề được sử dụng khá nhiều trong các project Laravel đó là thông báo realtime. Bất kì một tác vụ nào cần thông báo realtime như có comment mới, có lượt đăng ký mới, có like bài viết mới, … v.v chúng ta đều có thể sử dụng chức năng này.
Hiện tại Laravel đã hỗ trợ sẵn chúng ta làm việc này thông qua pusher Broadcast.
Vậy chi tiết như thế nào chúng ta cùng tìm hiểu nhé.
Để tạo được ứng dụng sử dụng dịch vụ này, chúng ta cần:
** Ở đây mình giả định các bạn đã cài đặt project Laravel thành công. Bạn nào chưa biết cách cài đặt thì vô đây nha: https://laravel.com/docs/5.7/installation
Để dùng được pusher, chúng ta sẽ sử dụng package pusher/pusher-php-server, mở command line của bạn và chạy lệnh:
composer require pusher/pusher-php-server
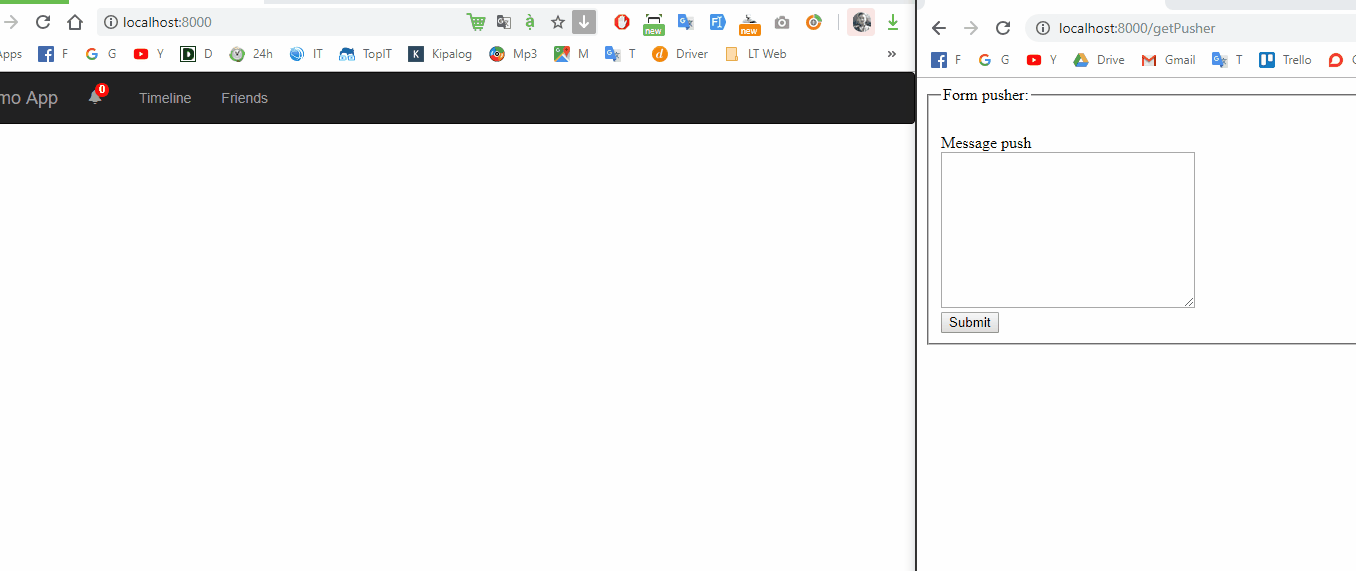
Trong file này mình sẽ tạo 3 route đó là view để submit form push notification, 1 route để handle xử lý push data to pusher channel và 1 view để xem notification đã push. Dưới đây là nội dung file routes/web.php:
Route::get('/', function () {
    return view('showNotification');
});

Route::get('getPusher', function (){
   return view('form_pusher');
});

Route::get('/pusher', function(Illuminate\Http\Request $request) {
    event(new App\Events\HelloPusherEvent($request));
    return redirect('getPusher');
});
Trong 3 route trên:
Tiếp đến chúng ta sẽ tạo view để send notification.
Chúng ta sẽ tạo 1 file view để gửi data đến pusher thông qua submit form
Nội dung file view form_pusher.blade.php:
<!DOCTYPE html>
<html lang="en">
<head>
    <meta charset="utf-8">
    <meta http-equiv="X-UA-Compatible" content="IE=edge">
    <meta name="viewport" content="width=device-width, initial-scale=1">
    <title>Demo Application</title>

</head>
<body>

<div class="container">
    <div class="col-md-4 col-md-offset-2">
        <fieldset style="padding-top: 30px">
            <legend>Form pusher:</legend>
            <form action="/pusher">
                <label for="">Message push</label>
                <br>
                <textarea name="contents" id="" cols="33" rows="10"></textarea>

                <br>
                <button class="btn btn-primary">Submit</button>
            </form>
        </fieldset>
    </div>
</div>
</body>
</html>
File này sẽ là file index để show notification khi có data từ pusher trả về.
Dưới đây là nội dung file showNotification.blade.php
<!DOCTYPE html>
<html lang="en">
<head>
    <meta charset="utf-8">
    <meta http-equiv="X-UA-Compatible" content="IE=edge">
    <meta name="viewport" content="width=device-width, initial-scale=1">
    <title>Demo Application</title>
    <link rel="stylesheet" href="//maxcdn.bootstrapcdn.com/bootstrap/3.3.7/css/bootstrap.min.css" integrity="sha384-BVYiiSIFeK1dGmJRAkycuHAHRg32OmUcww7on3RYdg4Va+PmSTsz/K68vbdEjh4u" crossorigin="anonymous">
    <style>.dropdown-container{position:absolute;top:100%;left:0;z-index:1000;display:none;float:left;min-width:200px;max-width:330px;margin:2px 0 0;list-style:none;font-size:14px;background-color:#fff;border:1px solid #ccc;border:1px solid rgba(0,0,0,0.15);border-radius:4px;-webkit-box-shadow:0 6px 12px rgba(0,0,0,0.175);box-shadow:0 6px 12px rgba(0,0,0,0.175);background-clip:padding-box}.dropdown-container>.dropdown-menu{position:static;z-index:1000;float:none !important;padding:10px 0;margin:0;border:0;background:transparent;border-radius:0;-webkit-box-shadow:none;box-shadow:none;max-height:330px;overflow-y:auto}.dropdown-container>.dropdown-menu+.dropdown-menu{padding-top:0}.dropdown-menu>li>a{overflow:hidden;white-space:nowrap;word-wrap:normal;text-decoration:none;text-overflow:ellipsis;-o-text-overflow:ellipsis;-webkit-transition:none;-o-transition:none;transition:none}.dropdown-toggle{cursor:pointer}.dropdown-header{white-space:nowrap}.open>.dropdown-container>.dropdown-menu,.open>.dropdown-container{display:block}.dropdown-toolbar{padding-top:6px;padding-left:20px;padding-right:20px;padding-bottom:5px;background-color:#fff;border-bottom:1px solid rgba(0,0,0,0.15);border-radius:4px 4px 0 0}.dropdown-toolbar>.form-group{margin:5px -10px}.dropdown-toolbar .dropdown-toolbar-actions{float:right}.dropdown-toolbar .dropdown-toolbar-title{margin:0;font-size:14px}.dropdown-footer{padding:5px 20px;border-top:1px solid #ccc;border-top:1px solid rgba(0,0,0,0.15);border-radius:0 0 4px 4px}.anchor-block small{display:none}@media (min-width:992px){.anchor-block small{display:block;font-weight:normal;color:#777777}.dropdown-menu>li>a.anchor-block{padding-top:6px;padding-bottom:6px}}@media (min-width:992px){.dropdown.hoverable:hover>ul{display:block}}.dropdown-position-topright{top:auto;right:0;bottom:100%;left:auto;margin-bottom:2px}.dropdown-position-topleft{top:auto;right:auto;bottom:100%;left:0;margin-bottom:2px}.dropdown-position-bottomright{right:0;left:auto}.dropmenu-item-label{white-space:nowrap}.dropmenu-item-content{position:absolute;text-align:right;max-width:60px;right:20px;color:#777777;overflow:hidden;white-space:nowrap;word-wrap:normal;-o-text-overflow:ellipsis;text-overflow:ellipsis}small.dropmenu-item-content{line-height:20px}.dropdown-menu>li>a.dropmenu-item{position:relative;padding-right:66px}.dropdown-submenu .dropmenu-item-content{right:40px}.dropdown-menu>li.dropdown-submenu>a.dropmenu-item{padding-right:86px}.dropdown-inverse .dropdown-menu{background-color:rgba(0,0,0,0.8);border:1px solid rgba(0,0,0,0.9)}.dropdown-inverse .dropdown-menu .divider{height:1px;margin:9px 0;overflow:hidden;background-color:#2b2b2b}.dropdown-inverse .dropdown-menu>li>a{color:#cccccc}.dropdown-inverse .dropdown-menu>li>a:hover,.dropdown-inverse .dropdown-menu>li>a:focus{color:#fff;background-color:#262626}.dropdown-inverse .dropdown-menu>.active>a,.dropdown-inverse .dropdown-menu>.active>a:hover,.dropdown-inverse .dropdown-menu>.active>a:focus{color:#fff;background-color:#337ab7}.dropdown-inverse .dropdown-menu>.disabled>a,.dropdown-inverse .dropdown-menu>.disabled>a:hover,.dropdown-inverse .dropdown-menu>.disabled>a:focus{color:#777777}.dropdown-inverse .dropdown-header{color:#777777}.table>thead>tr>th.col-actions{padding-top:0;padding-bottom:0}.table>thead>tr>th.col-actions .dropdown-toggle{color:#777777}.notifications{list-style:none;padding:0}.notification{display:block;padding:9.6px 12px;border-width:0 0 1px 0;border-style:solid;border-color:#eeeeee;background-color:#fff;color:#333333;text-decoration:none}.notification:last-child{border-bottom:0}.notification:hover,.notification.active:hover{background-color:#f9f9f9;border-color:#eeeeee}.notification.active{background-color:#f4f4f4}a.notification:hover{text-decoration:none}.notification-title{font-size:15px;margin-bottom:0}.notification-desc{margin-bottom:0}.notification-meta{color:#777777}.dropdown-notifications>.dropdown-container,.dropdown-notifications>.dropdown-menu{width:450px;max-width:450px}.dropdown-notifications .dropdown-menu{padding:0}.dropdown-notifications .dropdown-toolbar,.dropdown-notifications .dropdown-footer{padding:9.6px 12px}.dropdown-notifications .dropdown-toolbar{background:#fff}.dropdown-notifications .dropdown-footer{background:#eeeeee}.notification-icon{margin-right:6.8775px}.notification-icon:after{position:absolute;content:attr(data-count);margin-left:-6.8775px;margin-top:-6.8775px;padding:0 4px;min-width:13.755px;height:13.755px;line-height:13.755px;background:red;border-radius:10px;color:#fff;text-align:center;vertical-align:middle;font-size:11.004px;font-weight:600;font-family:"Helvetica Neue",Helvetica,Arial,sans-serif}.notification .media-body{padding-top:5.6px}.btn-lg .notification-icon:after{margin-left:-8.253px;margin-top:-8.253px;min-width:16.506px;height:16.506px;line-height:16.506px;font-size:13.755px}.btn-xs .notification-icon:after{content:'';margin-left:-4.1265px;margin-top:-2.06325px;min-width:6.25227273px;height:6.25227273px;line-height:6.25227273px;padding:0}.btn-xs .notification-icon{margin-right:3.43875px}</style>
    <!--[if lt IE 9]>
    <script src="https://oss.maxcdn.com/html5shiv/3.7.3/html5shiv.min.js"></script>
    <script src="https://oss.maxcdn.com/respond/1.4.2/respond.min.js"></script>
    <![endif]-->
</head>
<body>
<nav class="navbar navbar-inverse">
    <div class="container-fluid">
        <div class="navbar-header">
            <button type="button" class="navbar-toggle collapsed" data-toggle="collapse" data-target="#bs-example-navbar-collapse-9" aria-expanded="false">
                <span class="sr-only">Toggle navigation</span>
                <span class="icon-bar"></span>
                <span class="icon-bar"></span>
                <span class="icon-bar"></span>
            </button>
            <a class="navbar-brand" href="#">Demo App</a>
        </div>

        <div class="collapse navbar-collapse">
            <ul class="nav navbar-nav">
                <li class="dropdown dropdown-notifications">
                    <a href="#notifications-panel" class="dropdown-toggle" data-toggle="dropdown">
                        <i data-count="0" class="glyphicon glyphicon-bell notification-icon"></i>
                    </a>

                    <div class="dropdown-container">
                        <div class="dropdown-toolbar">
                            <div class="dropdown-toolbar-actions">
                                <a href="#">Mark all as read</a>
                            </div>
                            <h3 class="dropdown-toolbar-title">Notifications (<span class="notif-count">0</span>)</h3>
                        </div>
                        <ul class="dropdown-menu">
                        </ul>
                        <div class="dropdown-footer text-center">
                            <a href="#">View All</a>
                        </div>
                    </div>
                </li>
                <li><a href="#">Timeline</a></li>
                <li><a href="#">Friends</a></li>
            </ul>
        </div>
    </div>
</nav>

<script src="//cdnjs.cloudflare.com/ajax/libs/jquery/2.1.4/jquery.min.js"></script>
<script src="//js.pusher.com/3.1/pusher.min.js"></script>
<script src="//maxcdn.bootstrapcdn.com/bootstrap/3.3.7/js/bootstrap.min.js" integrity="sha384-Tc5IQib027qvyjSMfHjOMaLkfuWVxZxUPnCJA7l2mCWNIpG9mGCD8wGNIcPD7Txa" crossorigin="anonymous"></script>

<script type="text/javascript">
    var notificationsWrapper   = $('.dropdown-notifications');
    var notificationsToggle    = notificationsWrapper.find('a[data-toggle]');
    var notificationsCountElem = notificationsToggle.find('i[data-count]');
    var notificationsCount     = parseInt(notificationsCountElem.data('count'));
    var notifications          = notificationsWrapper.find('ul.dropdown-menu');

    if (notificationsCount <= 0) {
        notificationsWrapper.hide();
    }

    //Thay giá trị PUSHER_APP_KEY vào chỗ xxx này nhé
    var pusher = new Pusher('xxxxxxxxxxxxxxxxxxxxx', {
        encrypted: true,
        cluster: "ap1"
    });

    // Subscribe to the channel we specified in our Laravel Event
    var channel = pusher.subscribe('development');

    // Bind a function to a Event (the full Laravel class)
    channel.bind('App\\Events\\HelloPusherEvent', function(data) {
        var existingNotifications = notifications.html();
        var avatar = Math.floor(Math.random() * (71 - 20 + 1)) + 20;
        var newNotificationHtml = `
          <li class="notification active">
              <div class="media">
                <div class="media-left">
                  <div class="media-object">
                    <img src="https://api.adorable.io/avatars/71/`+avatar+`.png" class="img-circle" alt="50x50" style="width: 50px; height: 50px;">
                  </div>
                </div>
                <div class="media-body">
                  <strong class="notification-title">`+data.message+`</strong>
                  <!--p class="notification-desc">Extra description can go here</p-->
                  <div class="notification-meta">
                    <small class="timestamp">about a minute ago</small>
                  </div>
                </div>
              </div>
          </li>
        `;
        notifications.html(newNotificationHtml + existingNotifications);

        notificationsCount += 1;
        notificationsCountElem.attr('data-count', notificationsCount);
        notificationsWrapper.find('.notif-count').text(notificationsCount);
        notificationsWrapper.show();
    });
</script>
</body>
</html>
Dưới dây là nội dung file app/Events/HelloPusherEvent.php, file này đơn giản chỉ là lấy data từ form submit để push sang pusher
<?php
namespace App\Events;

use Illuminate\Broadcasting\InteractsWithSockets;
use Illuminate\Contracts\Broadcasting\ShouldBroadcast;
use Illuminate\Foundation\Events\Dispatchable;
use Illuminate\Http\Request;
use Illuminate\Queue\SerializesModels;

class HelloPusherEvent implements ShouldBroadcast
{
    use Dispatchable, InteractsWithSockets, SerializesModels;

    public $message;

    public function __construct(Request $request)
    {
        $this->message  = $request->contents;
    }

    public function broadcastOn()
    {
        return ['development'];
    }
}
Các bạn truy cập vào web https://pusher.com/ đăng ký tài khoản sau đó đăng nhập và tạo app:

Sau khi tạo app các bạn vào xem detail channel mới tạo sẽ nhận được:
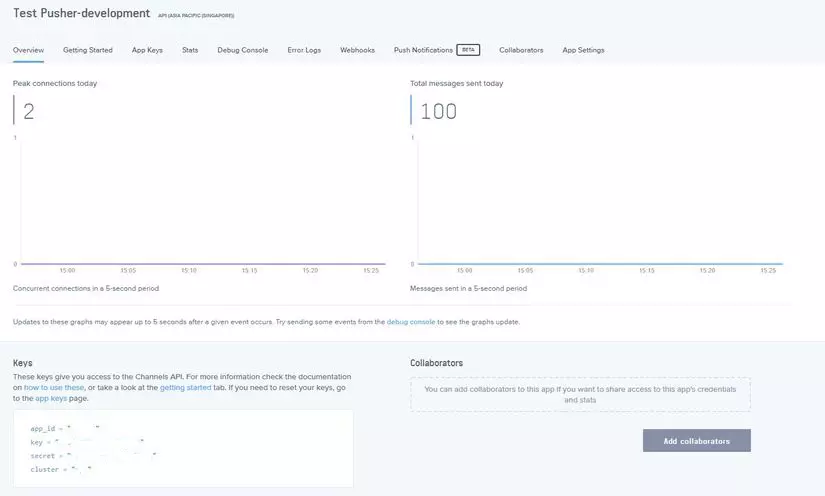
app_id = "xxxxx"
key = "xxxxxxxxxxxxxxxxxxxxx"
secret = "xxxxxxxxxxxxxxxxxxxxxx"
cluster = "ap1"
và cập nhật lại file .env như sau:
BROADCAST_DRIVER=pusher

PUSHER_APP_ID=xxxxx
PUSHER_APP_KEY=xxxxxxxxxxxxxxxxxxxxx
PUSHER_APP_SECRET=xxxxxxxxxxxxxxxxxxxxx
PUSHER_APP_CLUSTER=ap1
Mời các bạn theo dõi trong ảnh nhé 
Như vậy mình đã demo và hướng dẫn cho các bạn cách tạo dựng app để push notification realtime trên ứng dụng laravel. Các bạn có thể tự áp dụng notification trong project của mình rồi nhé  Bài viết dự trên kinh nghiệm bản thân và tài liệu tham khảo, nếu có chỗ nào thắc mắc hay cần thảo luận các bạn vui lòng để lại comment bên dưới nhé.
Cảm ơn các bạn đã theo dõi bài viết của mình, hẹn gặp lại các bạn trong bài viết tiếp theo .
Firebase là một hệ thống backend của google, cung cấp rất nhiều dịch vụ như:
ở bài hôm nay mình sẽ giới thiệu cách sử dụng firebase realtime database với Laravel
Đầu tiên hãy vào link này https://firebase.google.com/. Click vào Get Started.
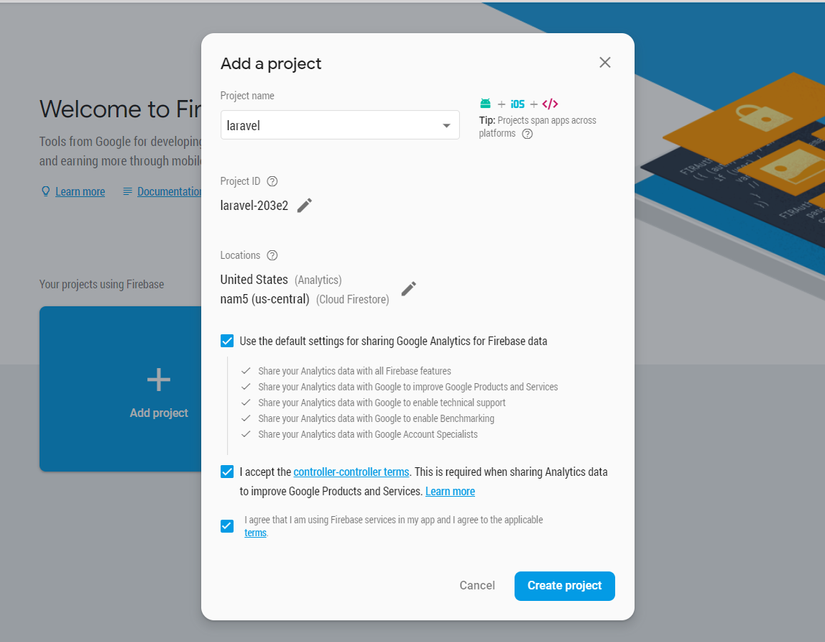
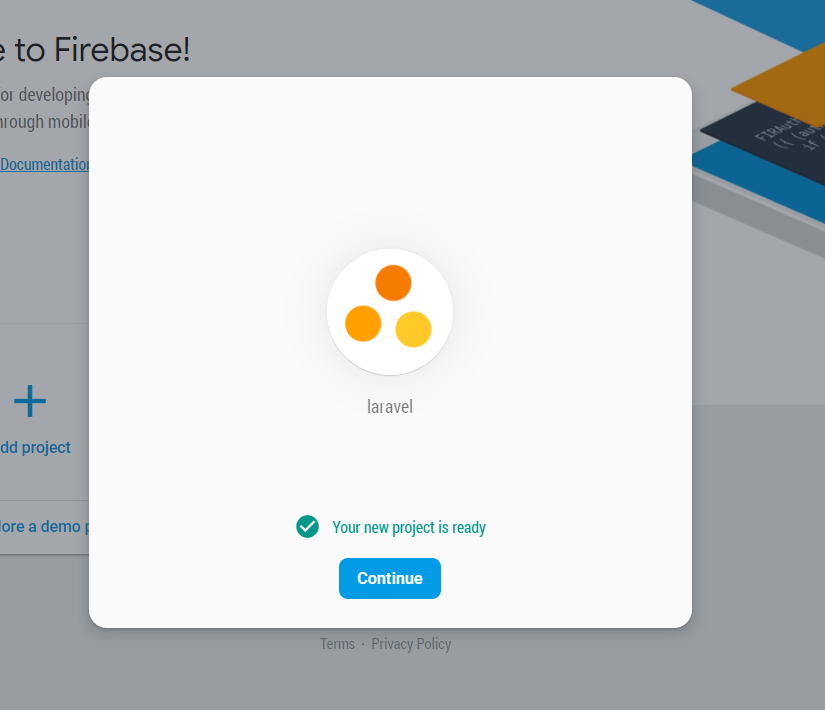
Click vào Add project để tạo 1 project mới.
Chờ 1 lúc rồi click continue. Trình duyệt sẽ chuyển sang trang dashboard của firebase.
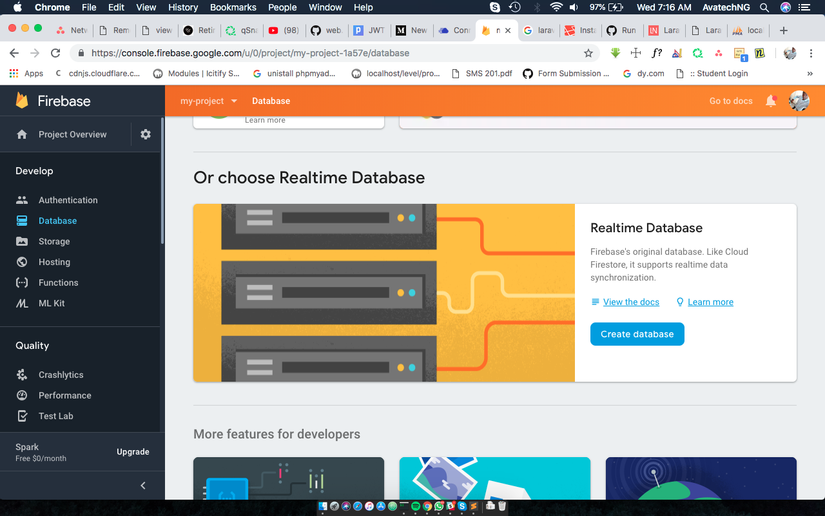
Ta vào mục Database để tạo 1 database mới
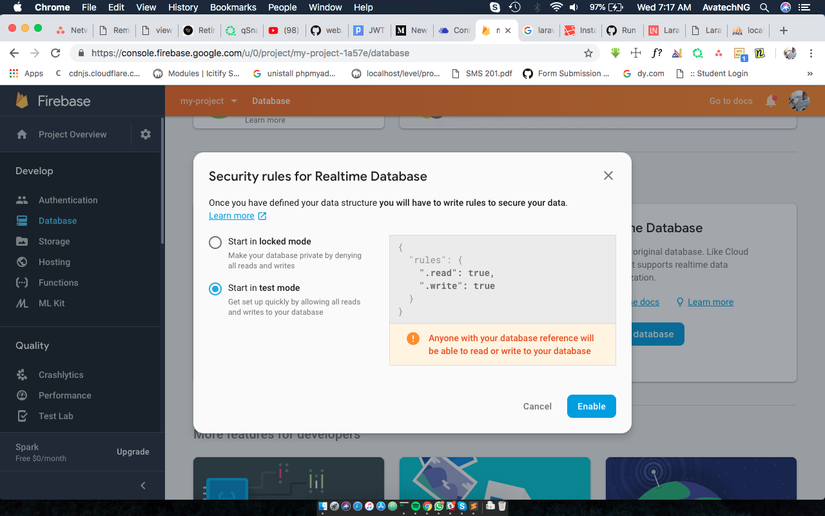
chọn Start in test mode
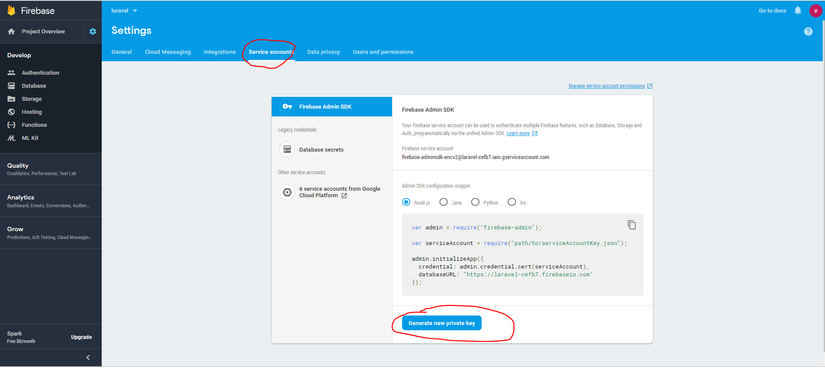
Sau đó vào mục Project Setting 
Vào tab Service Accounts rồi chọn Generate new private key
Ta sẽ được 1 file json có dạng như sau
{
  "type": "service_account",
  "project_id": "laravel-cefb7",
  "private_key_id": "4f9076071bef72d53d70fa402fd16cba4ac04721",
  "private_key": "-----BEGIN PRIVATE KEY-----\nMIIEvQIBADANBgkqhkiG9w0BAQEFAASCBKcwggSjAgEAAoIBAQCZxYLAMhoDXkvK\n+3FEr4RABAPQRGE0mj8xdbMLnDTO5Ic2O1EmNUNrbZrva6wP7+W5e9aneoezR8t6\nFS+9T1Wskd37wQy3fB7Dm/qdGkvs27yAhnmUqsmBiPAkDGUm/VJG2JgXVNewjSOi\nQGFYIE7QsNkY1OyKcFyngd327FHJpKTWGrHr0x7OWeLIyk2OuZAc1+XwdD5wn+5M\n8tXEkieaUWpHguAXb+CHSHFnz2TfwSTa/4mAsZEYMikk/xzCW3TB0jtM8PGfT973\n5vZBleEqyD6YlA1kcIb9Sz0KNnJ5wqpmvcL6p1Aze4Nz9FW9CKi2dul0QPuaV6bM\nsWaMGrY7AgMBAAECggEAJZUV10aHgBJAYPxiWyCwqHqyuei0f0hBsKNtHqXPbE+D\nUnhd5YI4F54Cs4hz1bNSyKohNO6oEuO1sgFSmSi2Lka6Y+jzZDb0R+er8VC3hMzR\nvfHf7jtto3imBJF4+XYJcWJHjdBBJRfhwSqOAB1pVe0bKkwEAfPjWVdOuiZY+Pig\nrfy3T8lBH17Ud7K0ZlGcMmQs+PFvft0If/BrR2VhvZiXmIwzl5TZkkS68KipTBD/\n2+hzVUvBoaESnr7P04q2mF3SO5G461yVLB8zIZkCogDs1UIBIYlZ6LTPWTBjwXdi\n8lYLFfq0yqhPDkfdlwOmUkZd5jk4l0buyRkY50jT4QKBgQDYU5CBj4HHDRh4KOiR\nBUEpbE+/T8eyjTbBMm/NLdhfSOKrzI4EzNR1vi1n7b7WykVhpMqzkT1eN4dQPVad\nHHEHtnRm0/gmMP8CZrSzCA8IqN46KyMlQB4ZxVI8IDAEFhpqMqIsAfGrQzzh/Awv\n+rD83sZ+qsm2/ThDsPGAj95hIQKBgQC1+QUW9uAp/rWGK4KjkF3amk9oOdoY/Dca\n6ng96trpfXurvRJHN4RT8+DE+DJ0Y2zqfYHoU8ps87D4/BfKsDlMKLpNoTl77K5+\noGv2o8StrJIPY3qBjrOwao3IshcqcSDTBf2JLaGIsQg9Iv4yjA3Tn82hYb7TIUH4\n6XyIM6a/2wKBgQDVcra+L/RUjIZdYbgAB9hA4B9b3INlmVKylGqeYCMD+a226FIl\nSFpGh0zUJFDOLK0C6JAdWCzePxojwTIqObsJai02nOZYALZODzsy/7udxsnnSVMX\nWUmaEgnPS8806P5NVQKRO6XSX7i+Hm2EFe72w3XF3AzGotoWaIwSV2KMIQKBgBwe\necHdri/vEv/Dk3FQ6p/P/ns9jU0VFDLNjn0K4H76C/UyxzNICeOrKM1nCOzhPEBT\n2pIa+ImzcmJXGhoQ9xmkpX0/b5GNtj0M7wHytn6bzwoftht1AKE/Jd+gXWIKjybs\nowviiDaGHJ7N3HfVGoHcDLtmTkVzuy0Kb1rgmGDHAoGASB9h5Pd8jSY5h0QAANkV\nKlBm7OcGyUrcCglE73DGm+fv6B/+8t3Ma2ubwc8CQDgr22JyWdNr6jYW3CkRQ4N5\niDw5gQC+dvJ7TEymA1lRyoAKZZ6gkGJoWlGusK3STTmQbz+ysyYGurJKMpLKC4tK\npPgGcyOD0NiQ+no9IyDAKr0=\n-----END PRIVATE KEY-----\n",
  "client_email": "[email protected]",
  "client_id": "112140220979141836672",
  "auth_uri": "https://accounts.google.com/o/oauth2/auth",
  "token_uri": "https://oauth2.googleapis.com/token",
  "auth_provider_x509_cert_url": "https://www.googleapis.com/oauth2/v1/certs",
  "client_x509_cert_url": "https://www.googleapis.com/robot/v1/metadata/x509/firebase-adminsdk-encv2%40laravel-cefb7.iam.gserviceaccount.com"
}
Bạn có thể lưu file này ở bất cứ chỗ nào trong project. Mình sẽ lưu ở trong thư mục controllers.
Đầu tiên, ta cài đặt package Kreait Firebase :
composer require kreait/firebase-php ^4.0
Sau đó ta tạo 1 controller
php artisan make:controller FirebaseController -r
Trong hàm __construct của controller ta thêm đoạn code sau
    protected $userRepository;
    protected $database;
    protected $firebase;

    public function __construct()
    {
        $serviceAccount = ServiceAccount::fromJsonFile(__DIR__ . '/laravel.json'); // đường dẫn của file json ta vừa tải phía trên
        $this->firebase           = (new Factory)
            ->withServiceAccount($serviceAccount)
            ->withDatabaseUri('https://{project-id}.firebaseio.com') //bạn có thẻ lấy project id ở mục project setting > general
            ->create();
        $this->database = $this->firebase->getDatabase();

        $this->userRepository = $this->database->getReference('user'); //lấy model user.
    }
Ok vậy là bạn đã có thể sử dụng firebase rồi đó.
Ordering Data
by key
$db->getReference('currencies')
    // order the reference's children by their key in ascending order
    ->orderByKey()
    ->getSnapshot();
by value: phải có index
{
    "currencies": {
        ".indexOn": ".value"
    }
}
$db->getReference('currencies')
    // order the reference's children by their value in ascending order
    ->orderByValue()
    ->getSnapshot();
by child: sắp xép theo child value, phải có index
{
    "currencies": {
        ".indexOn": ".value"
    }
}
$db->getReference('people')
    // order the reference's children by the values in the field 'height' in ascending order
    ->orderByChild('height')
    ->getSnapshot();
Filltering Data
để fillter được data trước tiên bạn phải chọn kiểu order data trước
limit to first: lấy 1 số lượng bản ghi đầu tiên
$db->getReference('people')
    // order the reference's children by the values in the field 'height'
    ->orderByChild('height')
    // limits the result to the first 10 children (in this case: the 10 shortest persons)
    // values for 'height')
    ->limitToFirst(10)
    ->getSnapshot();
limit to last: lấy 1 số lượng bản ghi cuối cùng
$db->getReference('people')
    // order the reference's children by the values in the field 'height'
    ->orderByChild('height')
    // limits the result to the last 10 children (in this case: the 10 tallest persons)
    ->limitToLast(10)
    ->getSnapshot();
equal to: giống như where = với vế trái được lấy từ order by
$db->getReference('people')
    // order the reference's children by the values in the field 'height'
    ->orderByChild('height')
    // returns all persons being exactly 1.98 (meters) tall
    ->equalTo(1.98)
    ->getSnapshot();
Saving Data
$postData = [...];
$postRef = $db->getReference('posts')->push($postData);

$postKey = $postRef->getKey(); // The key looks like this: -KVquJHezVLf-lSye6Qg
Update Data
$uid = 'some-user-id';
$postData = [
    'title' => 'My awesome post title',
    'body' => 'This text should be longer',
];

// Create a key for a new post
$newPostKey = $db->getReference('posts')->push()->getKey();

$updates = [
    'posts/'.$newPostKey => $postData,
    'user-posts/'.$uid.'/'.$newPostKey => $postData,
];

$db->getReference() // this is the root reference
   ->update($updates);
Delete Data
        $reference = 'posts/' . $id;
        $db->getReference($reference)->remove();
Vậy là mình đã hướng dấn các bạn sử dụng dịch vụ Realtime Database của Firebase. Ở những bài sau mình sẽ hướng dẫn các bạn sử dụng các dịch vụ khác của Firebase.
Tài liệu tham khảo:
https://firebase-php.readthedocs.io/en/latest/
Trong các ứng dụng phần mềm hiện đại, các web API là không thể thiếu, có rất nhiều các mô hình ứng dụng sử dụng web API như mô hình server-to-server, hay mô hình SPA (Single Page Application). Trong quá trình phát triển các API, rất cần thiết phải bảo vệ dữ liệu khỏi những con mắt tò mò, điều này với các hệ thống truyền thống rất đơn giản còn với API thì sao? Laravel tạo ra một gói thư viện Passport giúp thực hiện xác thực trong API đơn giản đơn giản hơn, nó cung cấp đầy đủ OAuth2. Laravel Passport được xây dựng dựa trên League OAuth2 server được phát triển bởi Alex Bilbie. Gợi ý: Cơ bản về OAuth 2, bạn nên đọc trước khi bắt đầu với Laravel Passport. Phương châm bài viết này cũng như các bài viết khác, chúng ta sẽ vừa học lý thuyết và thực hành cùng các ví dụ luôn, như vậy sẽ Hiểu sâu và nhớ lâu, vần vãi :)).
Chúng ta bắt đầu với việc cài đặt Laravel Passport thông qua Composer do gói thư viện này không được tích hợp sẵn cùng với framework Laravel.
c:\my-lapt>composer require laravel/passport
Using version ^2.0 for laravel/passport
./composer.json has been updated
Loading composer repositories with package information
Updating dependencies (including require-dev)
Package operations: 12 installs, 0 updates, 0 removals
  - Installing phpseclib/phpseclib (2.0.5): Loading from cache
  - Installing psr/http-message (1.0.1): Loading from cache
...
Tiếp theo là những công việc chúng ta thường làm khi cài đặt một gói thư viện mới: Đăng ký provider trong config/app.php
'providers' => [
    ...
    Laravel\Passport\PassportServiceProvider::class,
    ...
],
Laravel Passport được thiết kế với một số các bảng trong cơ sở dữ liệu, bạn chỉ cần thực hiện lệnh artisan migrate. Passport đã đăng ký sẵn các bảng này trong framework, do đó bạn sẽ không tìm thấy các file tạo bảng trong thư mục database/migrates đâu.
c:\my-lapt>php artisan migrate
Migrating: 2016_06_01_000001_create_oauth_auth_codes_table
Migrated:  2016_06_01_000001_create_oauth_auth_codes_table
Migrating: 2016_06_01_000002_create_oauth_access_tokens_table
Migrated:  2016_06_01_000002_create_oauth_access_tokens_table
Migrating: 2016_06_01_000003_create_oauth_refresh_tokens_table
Migrated:  2016_06_01_000003_create_oauth_refresh_tokens_table
Migrating: 2016_06_01_000004_create_oauth_clients_table
Migrated:  2016_06_01_000004_create_oauth_clients_table
Migrating: 2016_06_01_000005_create_oauth_personal_access_clients_table
Migrated:  2016_06_01_000005_create_oauth_personal_access_clients_table
Ok, bước tiếp theo với câu lệnh artisan passport:install, sẽ tạo ra các khóa mã hóa dùng trong việc sinh ra các thẻ truy nhập (access token). Nó tạo ra hai khóa mã hóa là personal access và password grant.
c:\my-lapt>php artisan passport:install
Encryption keys generated successfully.
Personal access client created successfully.
Client ID: 1
Client Secret: erCzNy1k4G9rgHIc71xY9oyDfAoiEFX06w29audt
Password grant client created successfully.
Client ID: 2
Client Secret: xYedgLyFXXDuPXiZneBRqXW07nbHnLAGuvyoftfi
Các thông tin này bạn có thể lưu để dùng lại hoặc có thể lấy lại trong bảng oauth_clients trong database. Sau khi thực hiện câu lệnh này cần thêm trait Laravel\Passport\HasApiTokens và model App\User.php
<?php

namespace App;

use Laravel\Passport\HasApiTokens;
use Illuminate\Notifications\Notifiable;
use Illuminate\Foundation\Auth\User as Authenticatable;

class User extends Authenticatable
{
    use HasApiTokens, Notifiable;
Tiếp đó gọi phương thức routes() trong phương thức boot() của app\Providers\AuthServiceProvider.php.
<?php

namespace App\Providers;

use Laravel\Passport\Passport;
use Illuminate\Support\Facades\Gate;
use Illuminate\Foundation\Support\Providers\AuthServiceProvider as ServiceProvider;

class AuthServiceProvider extends ServiceProvider
{
    /**
     * The policy mappings for the application.
     *
     * @var array
     */
    protected $policies = [
        'App\Model' => 'App\Policies\ModelPolicy',
    ];

    /**
     * Register any authentication / authorization services.
     *
     * @return void
     */
    public function boot()
    {
        $this->registerPolicies();

        Passport::routes();
    }
}
Cuối cùng là driver cho api trong config/auth.php
'guards' => [
    'web' => [
        'driver' => 'session',
        'provider' => 'users',
    ],

    'api' => [
        'driver' => 'passport',
        'provider' => 'users',
    ],
],Passport có sẵn các JSON API cho việc tạo các client (client id và client secret) và access token, tuy nhiên nó cũng hỗ trợ các giao diện fontend để làm việc này. Laravel Passport đã xây dựng sẵn một số Vue component sử dụng cho các công việc trong OAuth 2. Thưc hiện publish các component này bằng câu lệnh vendor:publish như sau:
c:\my-lapt>php artisan vendor:publish --tag=passport-components
Copied Directory [\vendor\laravel\passport\resources\assets\js\components] To [\
resources\assets\js\components\passport]
Publishing complete.
Các Vue component được publish sẽ nằm trong thư mục resources\assets\js\components. Muốn sử dụng chúng cần khai báo trong resources/assets/js/app.js là điểm bắt đầu của ứng dụng Vue.js như sau:
Vue.component(
    'passport-clients',
    require('./components/passport/Clients.vue')
);

Vue.component(
    'passport-authorized-clients',
    require('./components/passport/AuthorizedClients.vue')
);

Vue.component(
    'passport-personal-access-tokens',
    require('./components/passport/PersonalAccessTokens.vue')
);
Sau khi đăng ký, thực hiện biên dịch lại bằng Laravel Mix với câu lệnh npm run dev.
npm run devTiếp đó, đưa các template vào bất kỳ đâu bạn muốn hiển thị các chức năng này.
<passport-clients></passport-clients>
<passport-authorized-clients></passport-authorized-clients>
<passport-personal-access-tokens></passport-personal-access-tokens>Tạm dừng lại lý thuyết, chúng ta sẽ cài đặt môi trường thực hành để thực hành với các dạng ủy quyền trong phần kế tiếp. Mô hình môi trường thực hành như sau:

Như trong mô hình OAuth 2, chúng ta thấy có 4 đối tượng, ở đây chúng ta sẽ xây dựng 2 hệ thống là Consumer.dev chính là Ứng dụng khách và Passport.dev là nơi cung cấp các dịch vụ API (bao gồm cả hai đối tượng: máy chủ ủy quyền và máy chủ tài nguyên). Ok, chúng ta sẽ tạo ra hai project Laravel có tên là consumer và passport, sau đó bạn có thể tạo các tên miền ảo cục bộ cho hai project này (Xem hướng dẫn tạo tên miền ảo cục bộ).
Tạo một project Laravel bình thường và cài đặt gói Guzzle HTTP bằng câu lệnh
composer require guzzlehttp/guzzleChú ý: Do quá trình tạo hai project này khá nhiều bước, bạn nào gặp vấn đề hãy comment ở dưới mình sẽ trả lời ngay khi có thể. Trong thời gian tới, mình sẽ quay lại màn hình phần này để upload lên Youtube giúp bạn thực hiện trực quan hơn. ## 4. Các dạng ủy quyền trong Laravel Passport
Chú ý: Bạn nên đọc Cơ bản về OAuth 2 để nắm được các thuật ngữ, khái niệm sử dụng trong bài.
Chúng ta cùng thực hiện các bước sử dụng trong cấp quyền bằng mã ủy quyền. Ví dụ như sau: Thực hiện một ví dụng giống như khi Tích hợp đăng nhập vào Facebook, hay Google, Twiter…, ở project consumer sẽ thực hiện tích hợp đăng nhập cấp bởi project passport.
Bước 1:
Vào http://passport.dev đăng ký ứng dụng (client bao gồm client_id và client_secret) giống như vào trang dành cho nhà phát triển của Facebook.

Nhập thông tin đăng ký bao gồm: application name, application website, redirect uri (Giao diện xây dựng sẵn của Laravel bỏ qua application website, bạn có thể tự thêm vào).

Click vào Create, passport.dev sẽ tạo ra Client Id và Client Secret cho ứng dụng consumer.

Bước 2: Xây dựng callback cho consumer.
Trong project Consumer, chúng ta tạo ra đường dẫn đăng nhập thông qua Passport là http://consumer.dev/auth/passport. Thêm route vào routes/web.php
use Illuminate\Http\Request;

Route::get('/auth/passport', function () {
     $query = http_build_query([
        'client_id' => '4',
        'redirect_uri' => 'http://consumer.dev/callback',
        'response_type' => 'code',
        'scope' => ''
      ]);

     return redirect('http://passport.dev/oauth/authorize?'.$query);
});

Route::get('/callback', function (Request $request) {
    $http = new GuzzleHttp\Client;

    $response = $http->post('http://passport.dev/oauth/token', [
        'form_params' => [
            'grant_type' => 'authorization_code',
            'client_id' => '4',
            'client_secret' => 'fuWkWtgITxQd0LqkrTFbZxkeCrtPoGnMndnp3kzJ',
            'redirect_uri' => 'http://consumer.dev/callback',
            'code' => $request->code
        ],
    ]);

    return json_decode((string) $response->getBody(), true);
});
Bước 3: Test
Bạn xem luồng thực hiện ủy quyền thông qua mã ủy quyền trong OAuth 2, ở đây chúng ta sẽ kiểm tra theo đúng các bước được đưa ra (13 bước).
1) Người dùng truy nhập ứng dụng consumer.dev
2) Consumer.dev hiển thị link “Đăng nhập bằng Passport” với đường dẫn là http://consumer.dev/auth/passport.
3) Người dùng nhấn vào đây, nó sẽ chuyển hướng đến request
https://passport.dev/oauth/authorize?response_type=code&client_id=CLIENT_ID&redirect_uri=CALLBACK_URL&scope=nhưng do yêu cầu này đòi hỏi phải xác thực nên nó chuyển hướng tiếp đến trang đăng nhập của Passport (chú ý, đây là đăng nhập của Passport.dev không phải của Consumer.dev do đó Consumer.dev không có thông tin về tài khoản người dùng). Giả sử chúng ta đã tạo tài khoản cho người dùng này là [email protected]/123456
4) Sau khi đăng nhập Passport.dev sẽ chuyển hướng về request ở trên và hiện ra thông báo người dùng cần ủy quyền cho ứng dụng Consumer.dev (Giống như khi thực hiện với Facebook, Google…)

5) Người dùng ủy quyền cho ứng dụng khi bấm vào Authorize và Passport.dev chuyển hướng tiếp đến đường dẫn
http://consumer.dev/callback?code=AUTHORIZATION_CODE6) Như vậy ứng dụng Consumer.dev đã nhập được mã ủy quyền và thực hiện POST đến đường dẫn
http://passport.dev/oauth/token?client_id=CLIENT_ID&client_secret=CLIENT_SECRET&
grant_type=authorization_code&code=AUTHORIZATION_CODE&redirect_uri=CALLBACK_URL
Chính là đoạn code này:
    $response = $http->post('http://passport.dev/oauth/token', [
        'form_params' => [
            'grant_type' => 'authorization_code',
            'client_id' => '4',
            'client_secret' => 'fuWkWtgITxQd0LqkrTFbZxkeCrtPoGnMndnp3kzJ',
            'redirect_uri' => 'http://consumer.dev/callback',
            'code' => $request->code
        ],
    ]);
7) Passport.dev kiểm tra thông tin Client Id, Client Secret kèm theo mã ủy quyền, nếu ok nó trả về access token và refresh token.

8) Ở đây, consumer đã có được access token và refresh token do đó nó biết được người dùng đã xác thực.
9 – 13) Consumer muốn lấy thông tin về người dùng có thể thực hiện gửi GET đến http://passport.dev/api/user với header có dạng Authorization: Bearer AUTHORIZATION_CODE. Sửa lại routes/web.php trên Consumer như sau:
<?php

use Illuminate\Http\Request;

Route::get('/', function () {
     $query = http_build_query([
        'client_id' => '4',
        'redirect_uri' => 'http://consumer.dev/callback',
        'response_type' => 'code',
        'scope' => ''
      ]);

     return redirect('http://passport.dev/oauth/authorize?'.$query);
});

Route::get('/callback', function (Request $request) {
    $http = new GuzzleHttp\Client;

    $response = $http->post('http://passport.dev/oauth/token', [
        'form_params' => [
            'grant_type' => 'authorization_code',
            'client_id' => '4',
            'client_secret' => 'fuWkWtgITxQd0LqkrTFbZxkeCrtPoGnMndnp3kzJ',
            'redirect_uri' => 'http://consumer.dev/callback',
            'code' => $request->code,
        ],
    ]);

    $body = json_decode((string) $response->getBody(), true);

    $response = $http->get('http://passport.dev/api/user', [
      'headers' => [
            'Authorization' => 'Bearer ' . $body['access_token'],
        ],
    ]);

    return json_decode((string) $response->getBody(), true);
});
Chú ý, ở đây máy chủ ủy quyền và máy chủ tài nguyên cùng là một và chính là Passport.dev. Khi thực hiện lại bạn sẽ thấy Consumer.dev đã lấy được thông tin người dùng khi gửi access token đến máy chủ tài nguyên.

Ủy quyền ngầm định tương tự như ủy quyền thông qua mã ủy quyền, tuy nhiên access token được gửi trực tiếp về client mà không thông qua mã ủy quyền. Loại ủy quyền này thường được sử dụng trong Javascript và các ứng dụng mobile, nơi mà thông tin bí mật của client không thể lưu trữ bảo mật. Để sử dụng loại ủy quyền này, cần gọi đến phương thức enableImplicitGrant trong AuthServiceProvider:
/**
 * Register any authentication / authorization services.
 *
 * @return void
 */
public function boot()
{
    $this->registerPolicies();

    Passport::routes();

    Passport::enableImplicitGrant();
}
Khi loại ủy quyền này được kích hoạt, chúng ta có thể sử dụng client ID để yêu cầu access token bằng cách gửi request đến /oauth/authorize như sau:
Route::get('/redirect', function () {
    $query = http_build_query([
        'client_id' => 'client-id',
        'redirect_uri' => 'http://example.com/callback',
        'response_type' => 'token',
        'scope' => '',
    ]);

    return redirect('http://your-app.com/oauth/authorize?'.$query);
});OAuth 2 Resource Owner Password Credential (ủy quyền theo thông tin người dùng) cho phép các ứng dụng bên thứ nhất như các ứng dụng điện thoại có thể lấy access token sử dụng username/password. Nó tạo ra trực tiếp access token cho ứng dụng mà không cần sử dụng authorization code (mã ủy quyền). Trước khi ứng dụng có thể sinh ra access token thông qua ủy quyền theo thông tin người dùng, bạn cần tạo ra một client (client id và client secret). Sử dụng câu lệnh passport:client với tùy chọn –password. Nếu đã thực hiện câu lệnh passport:install ở bước cài đặt, bạn không cần chạy thêm lệnh trên.
php artisan passport:client --passwordKhi đã tạo ra client, chúng ta có thể yêu cầu một access token thông qua một request POST đến đường dẫn /oauth/token cùng với username và password. Chú ý, route này đã được đăng ký bằng Passport::routes() trong AuthServiceProvider.php trong bước cài đặt, do đó không cần thêm route vào routes\api.php. Nếu request thành công, sẽ nhận được kết quả dạng JSON có chứa access token và refresh token.
$http = new GuzzleHttp\Client;

$response = $http->post('http://your-app.com/oauth/token', [
    'form_params' => [
        'grant_type' => 'password',
        'client_id' => 'client-id',
        'client_secret' => 'client-secret',
        'username' => '[email protected]',
        'password' => 'my-password',
        'scope' => '',
    ],
]);

return json_decode((string) $response->getBody(), true);
Loại ủy quyền này thường sử dụng khi Consumer.dev là một thành viên trong hệ thống trong đó Passport.dev cũng là thành viên, tức là Consumer.dev đã là người trong nhà cùng với Passport.dev, do đó người dùng có thể gửi username/password đến cho Consumer.dev mà không ngần ngại. Thực tế, ví dụ bạn đã có một website có CSDL khách hàng, khi bạn tạo một website khác mà muốn sử dụng lại CSDL khách hàng này để đăng nhập bạn có thể sử dụng loại ủy quyền này. Bước 1: Để thực hành loại ủy quyền này, chúng ta tạo ra một form đăng nhập trên Consumer.dev.
Chú ý:
Tạo view resources/view/normal-login.blade.php với nội dung.
<html>
<head>
  <title>Allaravel Test</title>
  <!-- Latest compiled and minified CSS -->
<link rel="stylesheet" href="https://maxcdn.bootstrapcdn.com/bootstrap/3.3.7/css/bootstrap.min.css" integrity="sha384-BVYiiSIFeK1dGmJRAkycuHAHRg32OmUcww7on3RYdg4Va+PmSTsz/K68vbdEjh4u" crossorigin="anonymous">
</head>
<body>
  <div class="wrapper">
    <div class="row">
      <div class="col-md-6 col-md-push-3">
        <div class="panel panel-default">
          <div class="panel-heading">
            <strong>Login</strong>
          </div>
          <div class="panel-body">
            <form action="http://consumer.dev/auth/normal" method="GET">
              <div class="form-group">
                <label>Email Address</label>
                <input class="form-control" placeholder="Enter your email address" type="text" v-model="login.email">
              </div>
              <div class="form-group">
                <label>Password</label>
                <input class="form-control" placeholder="Enter your email address" type="password" v-model="login.password">
              </div>
              <button class="btn btn-primary" type="submit">Login</button>
            </form>
          </div>
        </div>
      </div>
    </div>
  </div>
  <!-- Latest compiled and minified JavaScript -->
  <script src="https://maxcdn.bootstrapcdn.com/bootstrap/3.3.7/js/bootstrap.min.js" integrity="sha384-Tc5IQib027qvyjSMfHjOMaLkfuWVxZxUPnCJA7l2mCWNIpG9mGCD8wGNIcPD7Txa" crossorigin="anonymous"></script>
</body>
</html>
Bước 2: Thêm route vào routes/web.php
Route::get('/login', function () {
  return view('normal-login');
});

Route::get('/auth/normal', function (Request $request) {
  $http = new GuzzleHttp\Client;

  $response = $http->post('http://passport.dev/oauth/token', [
      'form_params' => [
          'grant_type' => 'password',
          'client_id' => '2',
          'client_secret' => 'dWMEqIfKYZJHop71TxrnNs4EM1FOU3MSRUxNndPB',
          'username' => '[email protected]',
          'password' => '123456',
          'scope' => '',
      ],
  ]);

  return json_decode((string) $response->getBody(), true);
});
Chú ý, form đăng nhập này sẽ GET đến http://consumer.dev/auth/normal và xử lý tiếp bằng cách gửi POST đến Passport.dev.
Bước 3: Test
Khi vào http://consumer.dev/login, chúng ta có trang login, cần nhắc lại các chú ý để các bạn khỏi nhầm lẫn:
Trên consumer.dev có thể có database lưu các thông tin người dùng đăng nhập, tùy thuộc vào thiết kế ứng dụng của bạn. Thực hiện đăng nhập bằng tài khoản ở trên [email protected]/123456. Kết quả chúng ta sẽ thấy

Như vậy, đã bỏ qua bước gửi mã ủy quyền đúng như luồng thực hiện trong OAuth 2.
Loại ủy quyền này phù hợp với các xác thực từ máy chủ đến máy chủ, ví dụ bạn sử dụng ủy quyền này trong các job được lập lịch, thực hiện các tác vụ bảo trì thông qua API. Để lấy được access token, chỉ cần gửi một request đến oauth/token:
$guzzle = new GuzzleHttp\Client;

$response = $guzzle->post('http://your-app.com/oauth/token', [
    'form_params' => [
        'grant_type' => 'client_credentials',
        'client_id' => 'client-id',
        'client_secret' => 'client-secret',
        'scope' => 'your-scope',
    ],
]);

echo json_decode((string) $response->getBody(), true);Như vậy, chúng ta đã thực hành với một số các loại ủy quyền trong Laravel Passport. Trong quá trình thực hiện, chúng thấy còn một số công việc khác chưa đi vào chi tiết, chúng ta sẽ cùng xem xét ở đây:
Mặc định, Laravel Passport tạo ra các access token có thời gian hiệu lực dài, chúng ta không bao giờ yêu cầu tạo lại access token bằng refresh token, tuy nhiên trong thiết kế ứng dụng của bạn có thể cần thời gian hiêu lực ngắn, việc này hoàn toàn có thể thực hiện được khi bạn sử dụng các phương thức tokensExpireIn() và refreshTokensExpireIn() trong phương thức boot() của AuthServiceProvider:
use Carbon\Carbon;

/**
 * Register any authentication / authorization services.
 *
 * @return void
 */
public function boot()
{
    $this->registerPolicies();

    Passport::routes();

    Passport::tokensExpireIn(Carbon::now()->addDays(15));

    Passport::refreshTokensExpireIn(Carbon::now()->addDays(30));
}Laravel Passport cho phép tạo các Client (Client ID và Client Secret) thông qua câu lệnh artisan passport:client. Ngoài ra, có thể thực hiện được thông qua các JSON API đã được xây dựng sẵn. Trong các ví dụ dưới đây, sẽ sử dụng Axios là một HTTP client dạng Javascript, axios đã được đưa vào sẵn trong cấu hình Laravel (package.json), bạn có thể cài đặt bằng npm install.
Gửi request GET đến oauth/clients
axios.get('/oauth/clients')
    .then(response => {
        console.log(response.data);
});Gửi request POST đến oauth/clients
const data = {
    name: 'Client Name',
    redirect: 'http://example.com/callback'
};

axios.post('/oauth/clients', data)
    .then(response => {
        console.log(response.data);
    })
    .catch (response => {
        // List errors on response...
    });
Chú ý, name là tên của Client, khi Client được tạo ra nó sẽ sinh Client ID và Client Secret gửi lại trong response.
Gửi request PUT đến oauth/clients/{client_id}
const data = {
    name: 'New Client Name',
    redirect: 'http://example.com/callback'
};

axios.put('/oauth/clients/' + clientId, data)
    .then(response => {
        console.log(response.data);
    })
    .catch (response => {
        // List errors on response...
});Gửi request DELETE đến oauth/clients/{client_id}
axios.delete('/oauth/clients/' + clientId)
    .then(response => {
        //
});Trước khi tạo ra access token, bạn cần tạo Personal Access Client là một khóa mật mã được sử dụng trong quá trình tạo các access token. Để tạo ra Personal Access Token bạn có thể sử dụng lệnh
php artisan passport:client --personalHoặc nếu đã chạy câu lệnh
php artisan passport:installtrong phần cài đặt rồi thì thôi.
Sử dụng phương thức createToken() của Model User để tạo ra access token
$user = App\User::find(1);

// Creating a token without scopes...
$token = $user->createToken('Token Name')->accessToken;

// Creating a token with scopes...
$token = $user->createToken('My Token', ['place-orders'])->accessToken;Các route cho API được khai báo trong routes/api.php (từ Laravel 5.3 các route được tách biệt từ app\Http\route.php về các file web.php, api.php trong thư mục routes). Để bắt buộc phải xác thực với các API giúp bảo vệ dữ liệu khỏi con mắt tò mò, chúng ta chỉ cần sử dụng Middleware auth:api cho các route này:
Route::get('/user', function () {
    //
})->middleware('auth:api');Cuối cùng thì cũng đã kết thúc, tổng kết lại bạn nắm được hai vấn đề chính là hiểu chi tiết hơn về OAuth 2 sau khi học Lý thuyết OAuth 2 và cách sử dụng Laravel Passport để tạo ra các hệ thống hỗ trợ OAuth 2. Bài viết được tổng hợp từ nhiều nguồn kết hợp với kinh nghiệm thực tế, nhưng không tránh khỏi thiếu sót, bạn hãy cùng thảo luận với chúng tôi ở comment dưới đây nhá.